

Summary: Version 1.5 of the Pico Engine finally brings identity into the engine itself: passkeys for humans, and OAuth for external apps and webhooks. Here’s the shape of the design, why identity is really three problems and not one, and why I shipped the human and third-party layers before the pico-to-pico layer.

Today I’m releasing version 1.5 of the Pico Engine. The primary features in this release are support for accounts, authentication to the UI via passkeys, OAuth client credentials for channels used as webhooks, and optional OAuth Authorization Code Grant credentials for any given pico mesh. If you know me, you might be thinking “wait you’ve been working on picos and identity for 25 years and you’re just getting around to bringing them together?!?” There’s a story there.
The original pico engine (what we call the “classic” pico engine) was begun in 2008. In that era of Infrastructure and Platform as a Service models, we’d have been silly to build a product that didn’t support identity and accounts. And we did. The classic pico engine, written in over 400,000 lines of Perl as an Apache module, has a full-blown identity system with passwords, accounts, and OAuth support. When we rewrote it (after the demise of Fuse) we were looking for something less of a platform and more personal. The new engine was implemented in Node and mainly used locally or in small experiments. Even as it grew and we started using it for more significant efforts like Manifold, we just wrapped it in an identity layer written separately.
But I’ve got some projects in mind that need proper identity to work and so the time has come to bite the bullet and add identity to the pico engine itself. Let me tell you about the architecture and what I’m releasing today.
Three Kinds of Identity
The first thing to get straight is that identity here isn’t one problem. It’s three. They are easy to lump together, but they ask different questions and want different answers. When I open the engine’s UI, the engine needs to know it’s talking to me. When one pico calls another, the pico on the receiving end needs to know which pico is calling and whether it’s allowed to do what it’s asking. And when something outside the engine, like Home Assistant or an inbound webhook, hits the public API, the engine needs to know who that caller is and what it can do. Keeping these three apart is what keeps the whole thing from turning into a tangle.
Each one has a natural answer:
Human to pico mesh. You sign in to your root pico with a passkey. Each root pico is its own WebAuthn relying party, so there’s no shared password and no central table of users. Once you’re signed in, that root pico acts as the controller for the entire mesh.
Pico to pico. This is the layer that gives a pico its own portable, cryptographic identity using DIDs and DIDComm to provide mutual authentication. That identity can survive a move from engine to engine, and it lets two picos from different meshes trust each other without anyone setting up a federation agreement first.
Third-party access. A webhook or an app can’t use my passkey session, and I don’t want it holding a bare URL that works forever. So it gets an OAuth token instead, one it has to ask for and one I can take back.
I’m building these as three layers, and I shipped the first and third in 1.5. That order probably looks backwards, so let me explain it. The pico-to-pico layer is the most interesting of the three, but it’s also the most work. It means moving DID keys into the engine as a core primitive, pulling a lot of KRL into wrangler, and eventually running pico-to-pico traffic over DIDComm instead of plain HTTP. That’s a big change, and it touches a lot of the engine. The other two layers don’t need any of that. Passkeys and OAuth sit on top of machinery the engine already has: channels, ECIs, and channel policy. So I could add human sign-in and third-party access now, and leave the deeper identity work for when I can give it the attention it deserves.
No Usernames, No Passwords
One decision inside the human-to-mesh layer is worth pointing out: there are no usernames and no passwords anywhere in the engine. You register with a passkey and you sign in with a passkey, and that’s the whole story. There’s no email-and-password form to fall back on, no step where you make up a username, and no password database sitting on the engine waiting to be leaked. When you register, the engine creates your account and your root pico and ties them to a passkey your device holds. That is the account.
Part of the reason is that passwords carry problems I didn’t want to inherit. They get reused, phished, and stolen in bulk, and every system that stores them becomes a target. Passkeys sidestep all of that: the secret never leaves your device, there’s nothing shared for an attacker to steal, and signing in is a touch or a PIN rather than something you have to remember. But the bigger reason is that I think passwordless authentication is where things are headed, and I wanted to build something with no passwords at all and explore how that works. It’s easy to bolt passkeys on next to a password form as one more option; it’s more interesting to commit to them as the only way in. The cost is that the engine leans entirely on the passkey, which is part of why recovery is such a sharp edge, and I’ll come back to that below.
As an initial experiment, I’m pretty happy with it. Logging into different meshes is quick and easy. My password manager (1Password) lets me easily choose between different meshes, and not having to type in a username is great. A passwordless user experience is definitely a better user experience.
Webhooks: Client Credentials
The simplest kind of outside access is one machine talking to another: a webhook that posts an event to a single channel. This is a common pattern that I use frequently. For example, the sensor network that monitors the temperatures in the pumphouse at my cabin gets an event via a webhook from a Helium console.
Since a webhook only ever hits one channel, its credential should be scoped to one channel too. That’s a good fit for the OAuth Client Credentials grant. You create a channel for the webhook and tag it oauth-webhook. The channel’s ECI becomes its OAuth client id, and you create a secret for it from the Channels tab in the UI. The secret is shown once and stored hashed. The sender trades that secret for a bearer token at /oauth/token, then includes the token on every post to the channel’s /sky/ URL.
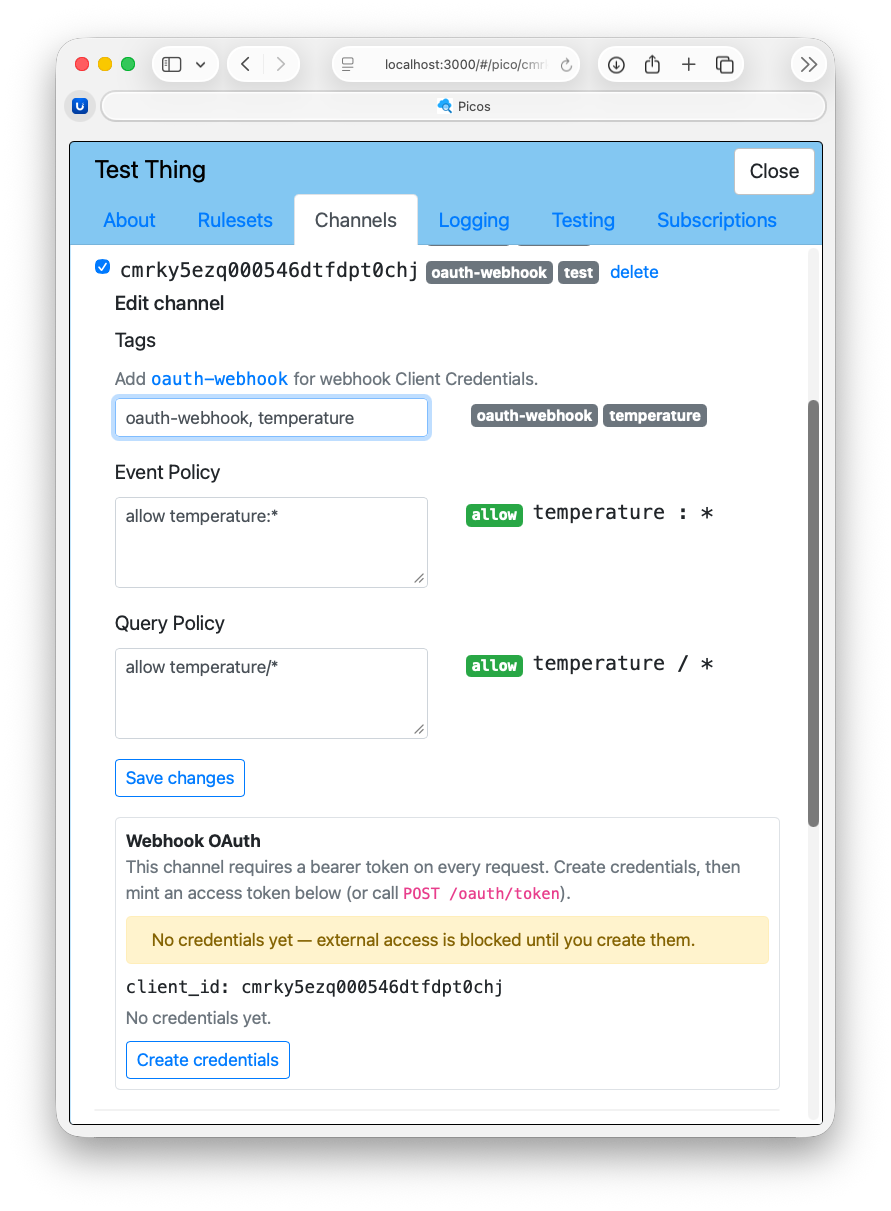
Two small decisions are worth noting. The first is that the access token is a real token, not the ECI itself. The old server used to hand back the ECI as a shared secret, which mixed up the pico’s address with the secret you need to reach it. Now the ECI stays in the URL, where routing needs it, and the token is a separate secret you can revoke on its own. The second is that tagging a channel oauth-webhook locks it right away. Any request without a valid token for that exact channel is turned away before channel policy even runs. Both decisions are about limiting the damage if something leaks. A webhook URL on its own is now useless, and even a stolen token only opens one channel.
Real webhook senders make this less tidy. Helium and Stripe, for instance, post to a fixed URL and will never call /oauth/token to get a token. For them, the bearer requirement still protects against someone discovering the URL, but it doesn’t verify that the payload actually came from Helium. That job usually falls to an HMAC signature, and I haven’t built that in here. Client Credentials is aimed at senders that can send an Authorizationheader. The fixed-URL senders are a separate problem for another day.
Whole-Mesh Apps: Authorization Code
The other kind of outside access is an app acting for a person across a whole mesh. The example driving the design is Home Assistant sitting in front of a pico mesh. A single channel is the wrong unit here, because the app needs to read and drive many picos under my root, not just one. So this uses the Authorization Code grant with PKCE, scoped to a root pico and everything under it. The flow is the ordinary OAuth dance. I register the app, which gets its own opaque id. The app sends me to /oauth/authorize, I sign in with my passkey and approve a consent screen, and the app trades the resulting code for a token it uses on any /sky/ event or query channel. Refresh tokens allow for rotation, and the access tokens are the same opaque bearers as the webhook case. The only difference is that they’re checked against the whole mesh instead of one channel.
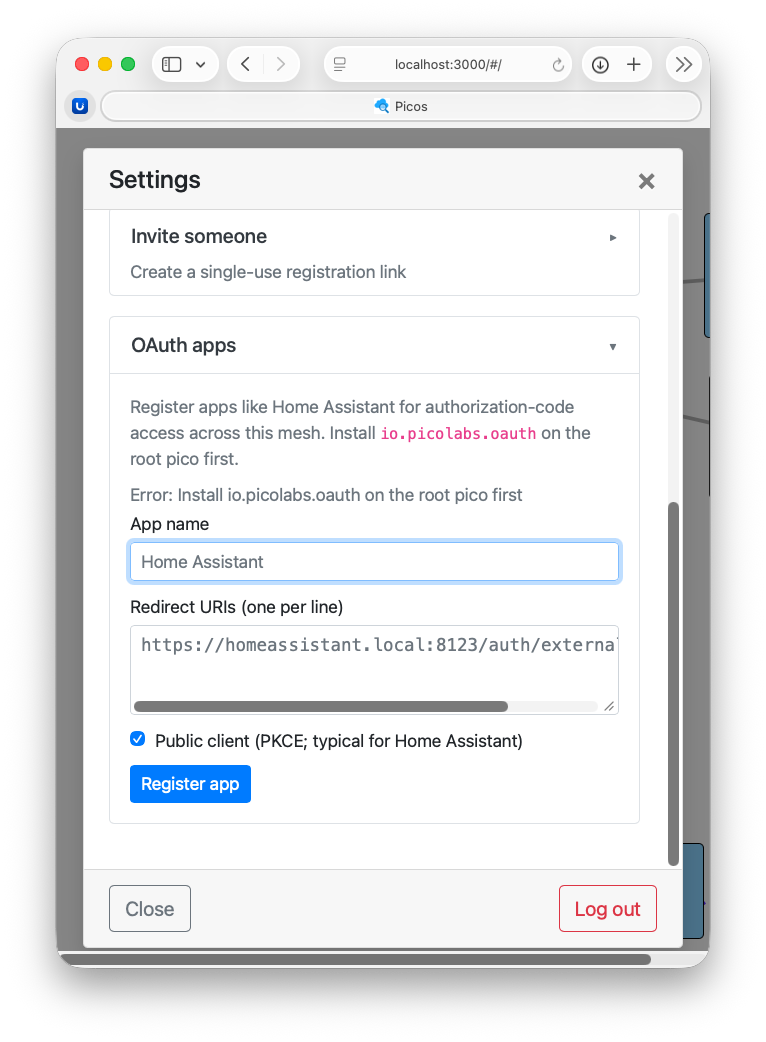
OAuth isn’t required on every mesh and an engine-wide switch would be wrong, because one engine can now host several independent roots that belong to different people. So the switch is per mesh instead. You install an optional Wrangler ruleset, io.picolabs.oauth, on the root pico. Once it’s there, every outside call to that mesh’s /sky/ endpoints has to carry a token. Leave it off and the mesh works the way it always has, under channel policy, with the one exception that oauth-webhook channels are always locked. That means one engine can run a locked-down mesh and an open one right next to each other. The engine still does the real work, holding the tokens, running the ceremony, and serving the routes. The ruleset just marks the mesh and carries its OAuth settings.
Both grant types can live in the same mesh without getting in each other’s way. They share one token store and one check, which just looks at what kind of token it is. A Client Credentials token is tied to the ECI in the URL. An Authorization Code token is checked against everything under its app’s root. Because the two are separate, revoking Home Assistant’s access leaves the webhook credentials alone, and revoking a webhook leaves the app alone. This lets a pico grant access to different services for different reasons.
Tradeoffs and What’s Next
This release makes a few deliberate choices that limit what the engine will do, and they’re worth being explicit about rather than leaving for you to trip over. The first is that there’s no admin. Each mesh has a single owner, and that owner is simply whoever holds the passkey. If you lose track of your passkey, there’s no recovery and no back door that lets you in anyway. That’s a hard edge, but it keeps the model simple, and it fits the pico ethos, where a pico is something you own outright rather than an account someone else grants you. It may not be enough for someone who wants to use the engine as the root of a user-facing system, where ordinary users expect a way to recover a lost login. That’s a fair worry, and one I’ll come back to.
For now the engine also assumes one owner per mesh. That owner can register more than one passkey, so a laptop, a phone, and a hardware key can all open the same mesh; “one owner” doesn’t have to mean “one device.” I expect to relax the single-owner rule down the road, but I wanted to start simple. And while the engine is multi-tenanted now, meaning one engine can host meshes belonging to different people, it doesn’t let just anyone sign up and create one. By default, new meshes come through an invitation from an existing owner. You can turn self-signup on if you want an open system, but off is the default.
Using the root pico as the entry point for all of its descendants is powerful. Signing in once gives you a handle on a whole tree of picos, and everything under the root inherits from that single point of control. But I want to be careful about what that does and doesn’t buy you. None of these changes automatically makes an engine or a pico mesh secure. Passkeys, OAuth, and channel policy are tools, not guarantees. A builder can still open a channel too wide, hand out a token that never expires, or run the engine on a host that isn’t locked down. What I’ve tried to do is give builders the pieces they need to move in a secure direction, with defaults that don’t fight them along the way.
All of this passes the tests I’ve written, but I’ll be honest that I haven’t put it in front of a real use case yet. Tests tell you the machinery works; they don’t tell you the design holds up when someone actually leans on it. The next thing I want to build is a Home Assistant layer for Manifold-based pico meshes, and that will be the first real exercise of this identity work. I expect to find the rough spots that way, and I’d rather learn them by using the thing than by guessing at them now.
Who Gets In
I’ve spent a long time arguing that people should have a personal cloud (to use an antiquated term). By that I mean software that acts for you, that you control, and that isn’t just a rented seat on someone else’s platform. The pieces in this release line up with that idea. A passkey proves you’re you. Your root pico gives you a mesh of your own out in the world. And OAuth lets you lend that mesh’s capabilities to the tools you choose, on terms you can revoke whenever you like. The piece still missing is the pico-to-pico layer, the one that will let a pico move between meshes and let two meshes trust each other without anyone in the middle. That work is still ahead. What I’m releasing today is the part that lets you walk up to a pico engine, prove who you are, and start working in a mesh that is unmistakably yours. If you want the nuts and bolts, the Identity System documentation walks through each piece.